Step-by-Step Guide to Installing an Electric Stove

Installing an electrical stove might seem intimidating, but it’s easier than you think. With the right tools and a clear plan, you can handle it yourself. Electric stoves are incredibly popular in the U.S., with 68% of households owning one. Their convenience and efficiency make them a top choice for many kitchens. Before you start, remember that preparation is key. Taking the time to ensure everything is ready will save you from unnecessary stress. If you ever feel stuck, don’t hesitate to seek help from a professional.
Key Takeaways
Preparation is crucial: Gather all necessary tools and materials before starting the installation to ensure a smooth process.
Safety first: Always turn off the power at the circuit breaker and use a voltage tester to confirm no electricity is flowing before beginning work.
Follow local codes: Check local electrical codes to ensure your installation meets safety standards and avoid potential fines.
Take accurate measurements: Measure the space for your stove to ensure a proper fit and adequate ventilation, preventing overheating.
Secure connections: Ensure all electrical connections are tight and properly configured to avoid malfunctions and ensure safety.
Test functionality: After installation, verify that the stove powers on and that all burners and the oven heat properly before use.
Seek professional help if needed: If you encounter any issues or feel unsure about the installation process, don’t hesitate to consult a licensed electrician.
Tools and Materials Needed

Before you dive into installing your electric stove, it’s crucial to gather necessary tools and materials. Having everything ready will make the process smoother and save you from unnecessary interruptions. Let’s break down what you’ll need.
Essential Tools for Installing an Electric Oven
You’ll need a few basic tools to get started. These are likely items you already have in your toolbox:
Screwdriver set: A versatile screwdriver set is essential for loosening and tightening screws during installation. Make sure you have both flathead and Phillips-head screwdrivers.
Adjustable wrench: This tool helps you tighten or loosen nuts and bolts, ensuring secure connections.
Voltage tester: Safety comes first. Use a voltage tester to confirm that no electricity is flowing before you start working.
Level: A level ensures your stove sits evenly, which is critical for proper operation and safety.
Materials for an Electrical Stove Installation
In addition to tools, you’ll need a few materials to complete the job. These items are just as important as the tools:
Power cord: Some stoves don’t come with a power cord. Check your appliance and purchase one if needed. Make sure it matches the voltage and amperage requirements of your stove.
Electrical tape: Use this to secure and insulate electrical connections.
User manual for the stove: The manufacturer’s manual provides specific instructions for your stove model. Keep it handy throughout the installation process.
Optional Tools for Installing a Cooktop
While not mandatory, these optional tools can make the job easier and safer:
Work gloves: Protect your hands from sharp edges and heavy lifting.
Safety goggles: Shield your eyes from dust, debris, or accidental sparks.
Pro Tip: Before starting, ensure the installation area is clean and free of obstacles. This will give you a clear workspace and reduce the risk of accidents.
By preparing these tools and materials in advance, you’ll set yourself up for a smooth and efficient installation. Remember, taking the time to organize everything beforehand can save you a lot of hassle later.
Safety Precautions
When installing an electric stove, safety should always come first. Taking the right precautions can protect you from accidents and ensure a smooth installation process. Let’s go over the key steps to keep you safe.
Turn Off Power Before Installing an Electric Oven
Electric stoves operate at high voltages, so working with live electricity is dangerous. You need to turn off the power to the kitchen before starting.
Locate the circuit breaker: Find your home’s electrical panel and identify the breaker that controls the kitchen. Flip it to the "off" position.
Confirm no electricity is flowing: Use a voltage tester to check the outlet where the stove will connect. This ensures the power is completely off and safe to work with.
Tip: Double-check the voltage requirements of your stove. Most electric stoves require 250 volts and specific amp receptacles for proper functioning. This step ensures compatibility and safety.
Use Safety Equipment When Installing a Cooktop
Protecting yourself during the installation process is just as important as following the instructions. Simple safety gear can make a big difference.
Wear gloves: These protect your hands from sharp edges on the stove or tools.
Use goggles: Safety goggles shield your eyes from dust, debris, or accidental sparks.
Pro Tip: If you’re planning to install a cooktop, safety gear becomes even more essential. Handling heavy appliances and electrical components can pose risks without proper protection.
Check Local Codes for Electrical Stove Installation
Every area has its own electrical codes, and following them is crucial. These regulations ensure your stove operates safely and efficiently.
Verify compliance: Check that your installation meets local electrical codes. These often specify the type of circuit and receptacle required for electric stoves.
Consider dimensions: Ensure the space for your stove matches the required dimensions outlined in the manufacturer’s manual. Proper spacing prevents overheating and allows for ventilation.
Reminder: Ignoring local codes can lead to safety hazards or even fines. If you’re unsure about the requirements, consult a licensed electrician for guidance.
By following these safety precautions, you’ll minimize risks and set yourself up for a successful installation. Always prioritize safety over speed, and don’t hesitate to seek professional help if needed.
Step-by-Step Installation Process
Installing an electric oven can feel like a big task, but breaking it into smaller steps makes it manageable. Follow this step-by-step guide to ensure a smooth and successful installation.
Step 1: Measure the Space for the Electronic Stove
Before you bring in your new stove, make sure it fits perfectly in the designated area. Proper measurements prevent unnecessary adjustments later.
Confirm the stove fits the designated area: Use a measuring tape to check the width, height, and depth of the space. Compare these dimensions with the specifications in the user manual of your electronic stove.
Check for proper ventilation and clearance: Ensure there’s enough space around the stove for ventilation. This prevents overheating and allows the appliance to function efficiently. Look for any obstructions like cabinets or walls that might block airflow.
Tip: Double-check the manufacturer’s recommendations for clearance. This ensures safety and optimal performance.
Step 2: Remove the Old Stove
If you’re replacing an existing stove, you’ll need to remove the old oven carefully. This step requires patience and attention to detail.
Disconnect the power cord: Unplug the stove from the outlet. If it’s hardwired, turn off the circuit breaker and use a voltage tester to confirm no electricity is flowing.
Carefully slide the old stove out of the space: Grip the sides of the stove firmly and pull it out slowly. Be cautious of sharp edges or wires that might still be connected.
Pro Tip: Place a piece of cardboard or a furniture slider under the stove to protect your flooring while moving it.
Step 3: Prepare the New Electrical Stove
Now it’s time to get your new stove ready for installation. This step ensures everything is in working order before connecting it to the power supply.
Inspect the power cord for damage or wear: Check the cord for any visible signs of fraying or damage. A faulty cord can cause electrical issues or even pose safety risks.
Attach the power cord to the stove (if not pre-installed): Follow the instructions in the user manual to connect the cord securely. Make sure the connections are tight and properly aligned.
Follow the manufacturer’s instructions for setup: Each stove model may have unique requirements. Refer to the manual for specific details on assembling or configuring your appliance.
Reminder: Keep the user manual handy throughout the process. It’s your go-to resource for troubleshooting and ensuring proper installation.
By completing these steps, you’ll set a solid foundation for the rest of the installation process. Taking the time to measure, remove, and prepare ensures a hassle-free experience when you install the electric oven.
Step 4: Connect the Stove to the Power Supply
Now that your electronic stove is ready, it’s time to connect it to the power supply. This step is crucial for ensuring the appliance functions properly and safely.
Plug the stove into the outlet or hardwire it (if required).
Start by checking the type of connection your stove requires. Most modern stoves come with a power cord that plugs directly into a compatible outlet. If your stove doesn’t have a pre-installed cord, follow the manufacturer’s instructions to attach one securely.
For stoves that require hardwiring, carefully connect the wires to the terminal block at the back of the stove. Match the wire colors—black to black, white to white, and green to ground. Tighten the screws to secure the connections. Always double-check the user manual for specific guidance on your model.
Safety Tip: Use a voltage tester to confirm the outlet or wiring is not live before making any connections. This ensures you safely plug the oven without risking electrical shock.
Ensure all connections in the back of the electric range are secure and properly configured.
Inspect the connections at the back of the stove. Loose or improperly configured wires can cause malfunctions or even pose safety hazards. Tug gently on each wire to ensure it’s firmly attached. If you’re using a plug-in model, make sure the cord is fully inserted into the outlet.
Pro Tip: If you’re unsure about hardwiring or notice any damage to the outlet, consult a licensed electrician. It’s better to be safe than sorry when dealing with high-voltage appliances.
Step 5: Position and Level the Stove
Once the stove is connected to the power supply, it’s time to position it in its designated spot. Proper placement ensures both functionality and safety.
Slide the stove into place.
Carefully move the stove into the prepared space. Use slow, steady movements to avoid damaging the floor or the appliance. If the stove feels heavy, ask for help to prevent injury. Make sure the back of the stove aligns with the wall and the power cord isn’t pinched or strained.
Tip: Place a piece of cardboard or a furniture slider under the stove to protect your flooring while sliding it into place.
Use a level to ensure it is even.
An uneven stove can lead to uneven cooking or even spills. Place a level on the cooktop surface to check if it’s balanced. Adjust the leveling legs at the bottom of the stove by turning them clockwise or counterclockwise until the bubble in the level is centered.
Reminder: Double-check the level after making adjustments. A properly leveled stove not only improves cooking performance but also enhances safety.
Step 6: Secure the Stove
The final step in installing an electric oven is securing it in place. This prevents tipping and ensures the appliance stays stable during use.
Attach any anti-tip brackets or safety features.
Most stoves come with anti-tip brackets to prevent accidents. Locate the brackets in the installation kit and follow the instructions to attach them to the wall or floor. Slide the stove back into position, ensuring the brackets engage with the appliance.
Safety Note: Anti-tip brackets are essential, especially if you have children or pets. They provide an extra layer of safety by keeping the stove firmly anchored.
With the stove securely in place, you’ve completed the installation process. Take a moment to admire your work and prepare for the final testing phase.
Testing the Installation
Once you’ve positioned and secured your stove, it’s time to ensure everything works as it should. Testing the installation is a crucial step to confirm that your efforts have paid off and your electronic stove is ready for use. Let’s walk through the process.
Check Power for the Electrical Stove
Before diving into cooking your first meal, you need to verify that the stove powers on correctly. Here’s how to do it:
Turn the circuit breaker back on.
Head to your home’s electrical panel and flip the circuit breaker for the kitchen back to the "on" position. This restores power to the outlet or hardwired connection you’ve just set up. If you’re unsure which breaker controls the kitchen, look for labels or test them one at a time.
Quick Tip: If the breaker trips immediately after turning it on, double-check the wiring and connections. This could indicate a short circuit or improper setup.
Verify the stove powers on.
Once the breaker is on, check the stove’s control panel or display. Most modern stoves will light up or beep when they receive power. If your stove has a clock, set the time to confirm the controls are responsive. For models without a display, try turning on a burner to see if it heats up.
Pro Tip: If the stove doesn’t power on, inspect the outlet or hardwired connection. A loose plug or improperly secured wire could be the culprit.
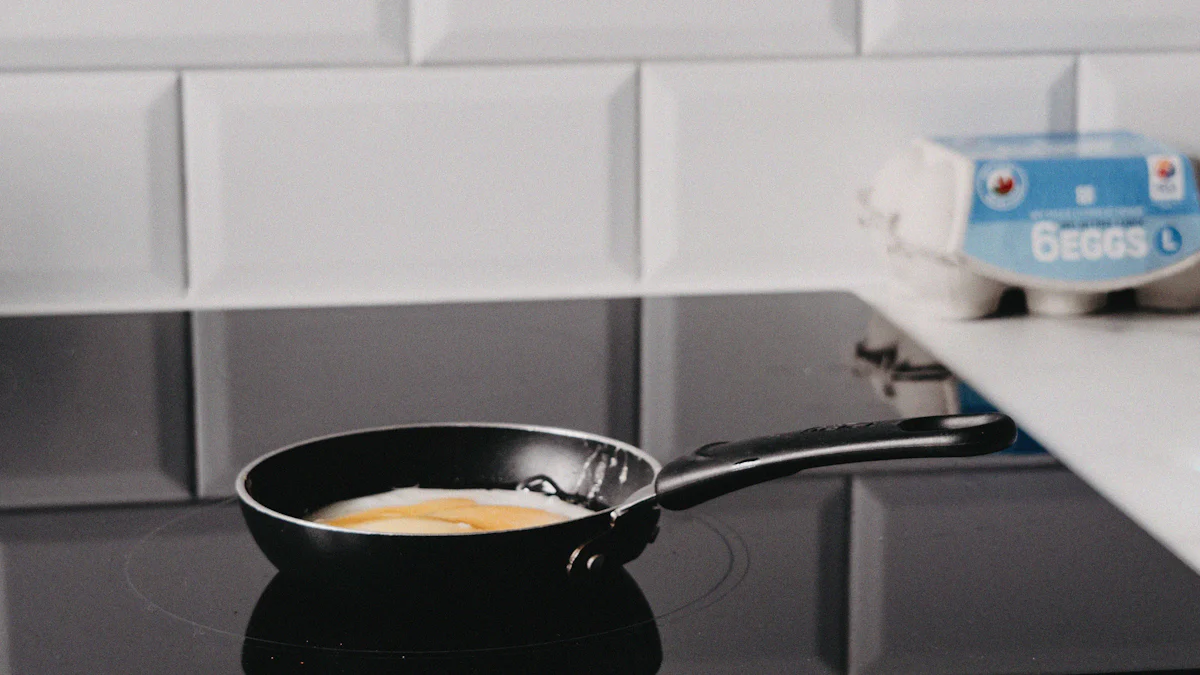
Test the Burners and Oven
After confirming the stove has power, you’ll want to test its functionality. This step ensures that both the burners and oven operate as expected.
Turn on each burner to ensure they heat properly.
Start by testing the burners one at a time. Turn the knob for each burner to a medium setting and wait a few seconds. You should feel heat radiating from the surface. If your stove has indicator lights, they should illuminate when a burner is active.
If a burner doesn’t heat up, check its connection to the stove. Some models have removable burners that may not be seated correctly.
Uneven heating? Make sure the stove is level. An unbalanced appliance can affect performance.
Customer Insight: Many users report that testing burners immediately after installation helps identify any issues early. One customer shared, “I noticed one burner wasn’t heating evenly, and it turned out the stove wasn’t level. Fixing it was quick and saved me a lot of frustration later.”
Test the oven by setting it to a low temperature and checking for heat.
To test the oven, set it to a low temperature, such as 200°F, and let it preheat for a few minutes. Open the door and carefully feel for warmth (without touching any surfaces). You can also place an oven thermometer inside to verify the temperature matches the setting.
If the oven doesn’t heat, double-check the power connection and ensure the settings are correct.
For uneven heating, inspect the placement of the racks and confirm the stove is level.
Reminder: Always refer to the user manual if you encounter issues. It often includes troubleshooting tips specific to your model.
By completing these tests, you’ll confirm that your electrical stove is fully operational and ready for use. Testing not only ensures safety but also gives you peace of mind knowing your installation was successful. Now, you’re all set to enjoy your new appliance and start cooking with confidence!
Troubleshooting and Tips
Even with careful preparation, you might encounter a few hiccups when installing an electric oven. Don’t worry—most issues have simple solutions. Let’s explore some common problems and practical tips to help you troubleshoot and complete the installation successfully.
Common Issues with Installing an Electric Oven
Stove doesn’t turn on: Check the power connection and circuit breaker.
If your stove doesn’t power on after installation, start by checking the basics. Ensure the power cord is securely plugged into the outlet. For hardwired stoves, inspect the electrical wiring at the terminal block. Loose or improperly connected wires can prevent the stove from functioning.
Next, head to your circuit breaker panel. Flip the breaker for the kitchen off and then back on. Sometimes, breakers trip during installation due to minor electrical surges. If the breaker trips again immediately, there might be a short circuit. In this case, double-check the wiring or consult a licensed electrician.
Quick Tip: Use a voltage tester to confirm the outlet is live before plugging in the stove. This ensures the issue isn’t with your home’s electrical system.
Uneven heating: Ensure the stove is level and connections are secure.
Uneven heating can make cooking frustrating. If you notice this issue, check if the stove is level. Place a level on the cooktop surface and adjust the leveling legs until the bubble is centered. An unbalanced stove can cause burners or the oven to heat unevenly.
Also, inspect the connections at the back of the stove. Loose wires or improperly seated burners can disrupt the flow of electricity, leading to inconsistent heating. Secure all connections and test the burners again.
Pro Tip: If the problem persists, refer to the user manual for troubleshooting steps specific to your electronic stove model.
Additional Tips for Installing a Cooktop
Keep the user manual handy for reference.
The user manual is your best friend during installation. It provides detailed instructions tailored to your specific appliance. Keep it nearby to quickly resolve any questions or issues that arise. Whether you’re attaching a power cord or configuring settings, the manual ensures you follow the correct steps.
Reminder: Many manuals also include diagrams of electrical wiring, which can be incredibly helpful if you’re unsure about connections.
If unsure about electrical work, consult a licensed electrician.
Electrical work can feel intimidating, especially if you’re not familiar with it. If you’re unsure about how to install a cooker or connect the stove to the power supply, don’t hesitate to call a professional. A licensed electrician ensures the installation meets local codes and operates safely.
Safety Note: Attempting complex electrical tasks without proper knowledge can lead to accidents or damage. It’s always better to invest in professional help than risk your safety.
By addressing these common issues and following these tips, you’ll make the process of installing an electric oven much smoother. Remember, preparation and attention to detail are key. If you ever feel stuck, take a step back, review the manual, or seek expert advice. With patience and the right approach, you’ll have your electrical stove up and running in no time.
Installing an electric stove doesn’t have to feel overwhelming. With the right tools and a clear plan, you can handle the process confidently. Always focus on safety first—double-check your connections and ensure everything is secure before powering up. Take your time to follow each step carefully. If something doesn’t seem right or feels too complex, don’t hesitate to call a professional. It’s better to ask for help than risk mistakes. By completing the installation properly, you’ll enjoy a reliable and efficient stove for years to come.
FAQ
What are the most common issues with electric stoves?
Electric stoves can sometimes face problems, but most of them are easy to troubleshoot. Common issues include burners not heating, uneven cooking, or the stove not turning on. To resolve these, start by checking the power connection and ensuring the circuit breaker hasn’t tripped. If a burner isn’t working, inspect its connection to the stove or ensure the appliance is level. For more complex problems, consult your user manual or contact a professional. A well-maintained stove ensures better performance and a longer lifespan.
Tip: Regular cleaning and inspection can prevent many of these issues from occurring in the first place.
What should I do if my stove doesn’t turn on?
If your stove doesn’t power on, follow these steps:
Check the power supply: Ensure the stove is plugged in securely and the outlet is functioning.
Inspect the circuit breaker: Look for a tripped breaker in your home’s electrical panel and reset it if necessary.
Refer to the user manual: Many manuals include troubleshooting tips for common problems.
Contact the manufacturer: If the issue persists, reach out to the manufacturer’s customer support for assistance.
Pro Tip: Use a voltage tester to confirm the outlet is live before assuming the stove is faulty.
How can I ensure my electric stove operates efficiently?
To keep your stove running efficiently, follow these tips:
Clean the burners and oven regularly to remove grease and debris.
Check the power cord and connections for wear or damage.
Ensure the stove is level to avoid uneven heating.
Follow the manufacturer’s maintenance recommendations in the user manual.
A little care goes a long way in extending the life of your stove and improving your cooking experience.
Is it safe to install an electric stove myself?
Yes, installing an electric stove yourself is safe if you follow proper guidelines and safety precautions. Turn off the power at the circuit breaker before starting, and use a voltage tester to confirm no electricity is flowing. Wear gloves and goggles for protection, and ensure all connections are secure. If you’re unsure about any step, consult a licensed electrician.
Reminder: Always prioritize safety over speed. If something feels too complicated, don’t hesitate to seek professional help.
Do I need to check local codes before installing an electric stove?
Yes, checking local electrical codes is essential. These codes ensure your installation meets safety standards and operates efficiently. They often specify the type of circuit and outlet required for electric stoves. Ignoring these regulations can lead to safety hazards or fines. If you’re unsure about the requirements, consult a licensed electrician.
Why is my stove heating unevenly?
Uneven heating usually happens when the stove isn’t level or the burners aren’t connected properly. Use a level to check the appliance and adjust the leveling legs if needed. Inspect the burners to ensure they’re seated correctly. If the problem persists, refer to the user manual or contact the manufacturer for guidance.
Quick Fix: Adjusting the stove’s position often resolves uneven heating issues quickly.
What should I do if the circuit breaker trips during installation?
If the circuit breaker trips, it could indicate a short circuit or an overloaded circuit. Turn off the breaker and inspect the wiring connections at the back of the stove. Ensure all wires are securely attached and match the correct colors. If the breaker continues to trip, consult a licensed electrician to identify and fix the issue.
Can I use any power cord for my electric stove?
No, you must use a power cord that matches the voltage and amperage requirements of your stove. Check the user manual for specifications and purchase a compatible cord if one isn’t included with the appliance. Using the wrong cord can lead to electrical issues or damage the stove.
Safety Note: Always double-check the cord’s compatibility before connecting it to the stove.
How often should I test my electric stove after installation?
Testing your stove immediately after installation is crucial. Turn on each burner and set the oven to a low temperature to ensure everything works properly. After that, test the stove periodically, especially if you notice any performance issues. Regular testing helps identify problems early and keeps your appliance in top condition.
When should I call a professional for help?
Call a professional if you encounter any of the following:
Persistent electrical issues, such as a tripping breaker or non-functional outlet.
Difficulty hardwiring the stove or securing connections.
Problems that aren’t resolved after following the user manual’s troubleshooting steps.
Final Thought: It’s always better to seek expert help than risk damaging your appliance or compromising safety.
See Also
Installing Your Electric Cooktop with Downdraft Ventilation
Essential Considerations for Selecting an Electric Stove
Best Advice for Your Freestanding Electric Range